Weaving project 32: fabric for a glasses case
I enjoyed weaving project 31 and liked the log cabin effect so thought I’d do the same again for weaving project 32. This time I decided to use a different yarn and different widths for the stripes to see how both of these changes affected the result. Having successfully sewn a glasses case the other week I thought I’d make my first attempt at weaving a material to sew and try and make another case. There were two reasons for this, firstly, the glasses case was easy to make and I knew that I was capable of sewing it. The second was that if my little sewing machine couldn’t take the weight of the fabric, hand-sewing it wasn’t going to take forever. I was concerned that if I tried something bigger, and then had to hand-sew it, I’d end up resenting it.
I used the finished glasses case as a guide and then attempted to work out the dimensions I needed to weave. My plan was to weave two panels, of a finished length 8” with a width of around 5” to allow half an inch of seam allowance on all sides. This should allow me to zig zag and straight stitch the seams giving more strength and hopefully keeping all the woven threads stable.
I ordered the yarn online as my local shop didn’t have a very wide selection of the colours available, and again fell victim to the difficulty of getting an idea of the actual colours from an shop’s photos. The “slate” grey is a bit paler than I’d expected but it does look ok against the “sunshine” yellow.
The panels
Panel one
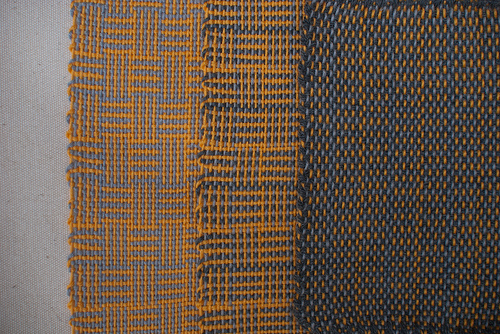
I started weaving as planned in 8 weft thread blocks. It was going pretty well but I kept being distracted by the chunky grey yarn (leftover from Mum’s lapghan) because I thought that even though it had been quickly thrown to even out the warp threads it looked really effective. Each repetition seemed to be coming out at around 2 cm. So I calculated that I would need to do 11 repetitions to get my desired length of 8 inches with a 10% allowance for shrinkage. This still isn’t a balanced weave. But, for the first time, it’s unbalanced in the other dimension - the same number of weft threads is bigger than the warp threads. The panel doesn’t look as 3d as the coasters but I’m not sure whether that’s as a result of the paler colours, or the smaller repetitions.
Panel two
After realising how well the dark grey yarn of the blanket looked against the sunshine and slate, I nipped out to my local yarn shop and looked at their supply of Baby Cashmerino. There, amongst their selection, was a darker grey. So I bought a ball. The dark grey complements the slate and sunshine really nicely. I’m not sure it helps with making it 3d but it is a pleasing effect. There were a couple of weeks gap between starting panel two and finishing it. Fortunately, I’d made notes as to how many repetitions I’d done and so did the same again (as by this time most of panel one was already wound on).
Panel three
Having completed panel two, it was obvious that I still had some usable warp length left so I decided to give that chunky grey yarn a try. It was super quick to work with. And resulted in a piece about 6 inches long. So, I can reduce my loom waste total I think as this is the second time I’ve ended up with a similar amount of spare warp.
Finishing
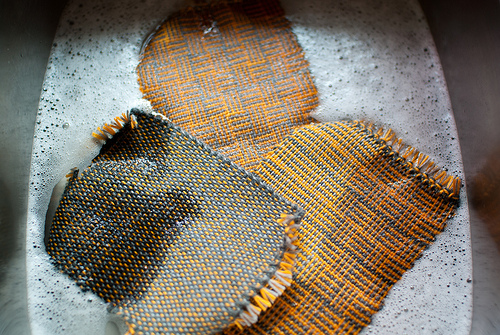
As with all other projects for the last year or so, all ends were hemstitched. The panels were removed from the loom and wet finished in a sink full of hand hot water and some washing liquid. I agitated them, let them soak and then agitated them again before rinsing and blocking.
Assembly
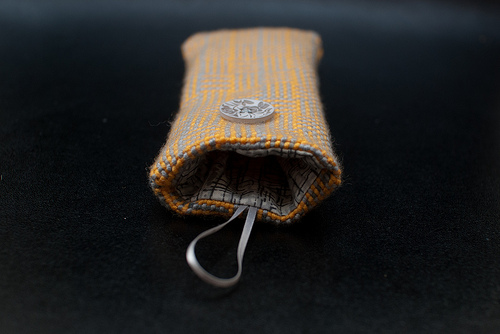
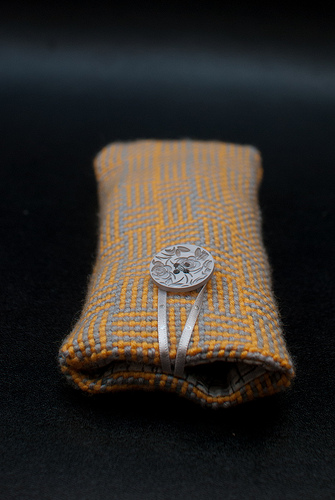
I wasn’t sure whether the two pieces back to back would turn out to be too thick for my little sewing machine. So, with a bit of trepidation, I sat down and tried. And it worked. There were a few moments where I thought it was going to need some encouraging but it mostly just worked. So, off I went. I’d chosen some fabric from my haul at last years Knitting and Stitching show as it seemed to be a good companion and match the greys. I’d bought some grey/silver ribbon. And a cute button. I stitched it in the same way I did the previous glasses case except that on all the woven material I running stitched twice and zig zag stitched twice to give it extra security and to try and ensure that all threads were firmly attached to each other.
One of the more difficult bits was trimming off the excess woven fabric. Not because it was physically hard. More because I was concerned that the minute I did that, the rest of it would fall into threads. Thankfully it didn’t.
Summary
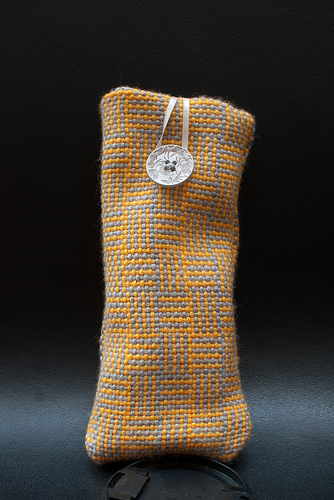
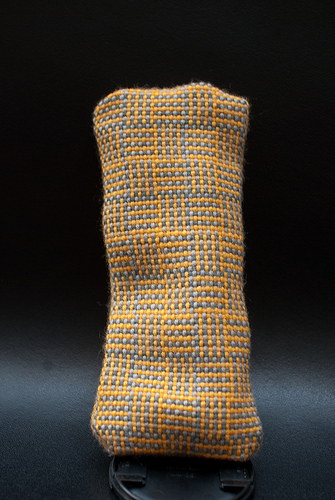
Neither the stitching, nor the weaving, are perfect — especially the top edges aren’t as straightly stitched as I’d have liked. But I love the ribbon and the button (much better than the fastening on the last one). And I really love that I can pick this up, and feel it (it’s really nice and soft), and know that not only did I assemble it, I made the fabric too.
I’m delighted to discover that I can weave fabric for things. The possibilities feel almost endless.