Weaving project 31: woven log-cabin coasters

The plan:
6 x 4 - 4.5” coasters following a log-cabin draft with an inch or so fringe using the same yarn as the previous two projects.
(another idea from The Weaver’s Idea Book)
The warp calculation:
- project length : 27”
- fringe : 15” (calculated at 2” per coaster plus extra half inch between each one)
- take-up (at 10%) : 4”
- shrinkage : ignored for this project
- loom waste : 22” (as calculated last time)
Total warp length: 68”
Warping the loom
Done solo again. And again it seemed to work out ok. It took about an hour to get it all warped up and ready. Really need to see if there is a way to warp it without making my back ache though!
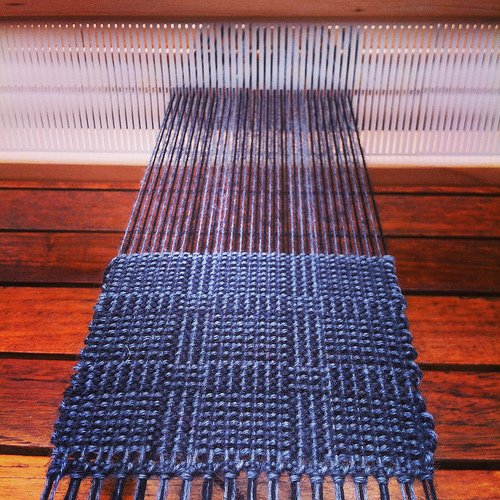
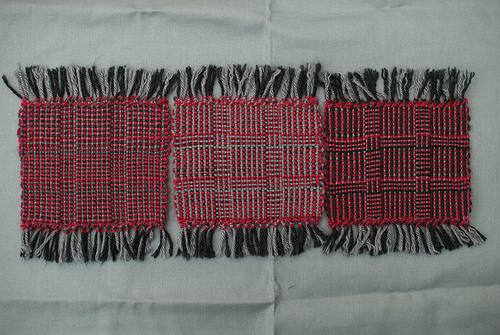
Coaster 1
Plan: same yarns as warp, same pattern as warp
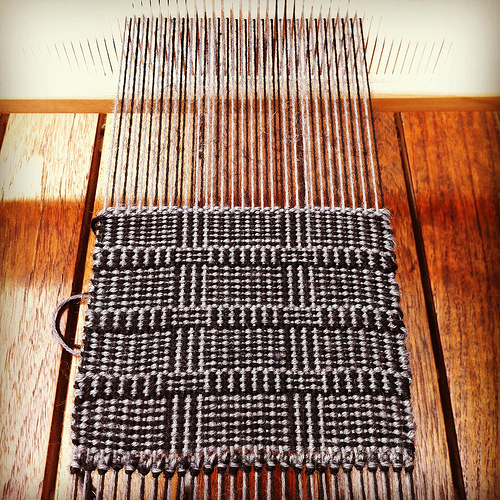
I started out with the intention that the first of the coasters would be straightforward and would just be a repeat of the warp structure. But, I soon realised that I’d been beating it too hard and it was far from balanced. And the more I continued, the less balanced it became, as I became more frustrated and less relaxed. The point of planning for 6 of these coasters was to learn as I went along, and try to get more consistent, and hopefully try some new things so it was frustrating but allowable. Just. I did an extra repetition of the thin and thick stripes and decided that it was now big enough to put a mug on and finished off.
I started and ended with 3 plain picks in the light grey and hemstitched 2 warps at a time using both the black and the grey threads together. This combined stitching worked quite well.
In retrospect I wish I’d done a further repetition of the pattern as an even number of weft stripes and an odd number of warp stripes looks unbalanced. Something to bear in mind for the rest of them!
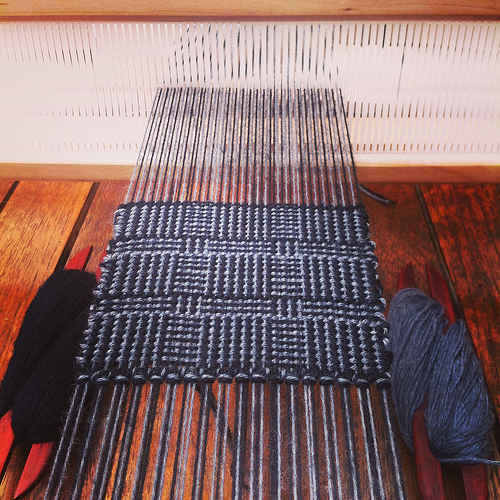
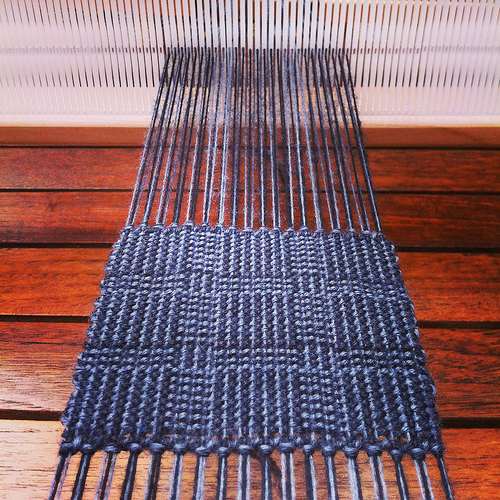
Coaster 2
Plan: same yarns as warp, same pattern as warp - retry of coaster 1

Much better. Much more balanced. Much less tightly beaten. Success.
Also, decided to hem stitch 3 warps together at a time and prefer how this looks over the 2 warps at a time. (This was the method adopted for all the future panels as well)
Having got the basic coaster made, I could now ring the changes a bit for the rest — trying different orders, colours etc
Coaster 3:
Plan: same yarns as warp, inverted pattern to warp (so instead of doing light, dark, light I’m doing dark, light, dark)
The difference that this makes is that the horizontal and vertical stripes switch around. So, instead of getting horizontal stripes on the wider section I get vertical stripes there. Not sure which I prefer but a good companion to coaster 2.
Again, happy with how this one has turned out. Still love how it looks like it’s got depth. Some form of optical illusion going on because it’s a totally flat piece of fabric.
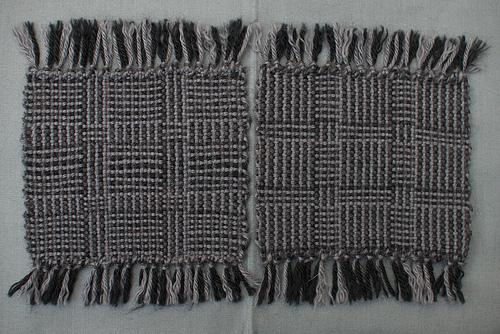
Coaster 4:
Plan: different coloured yarns to the warp
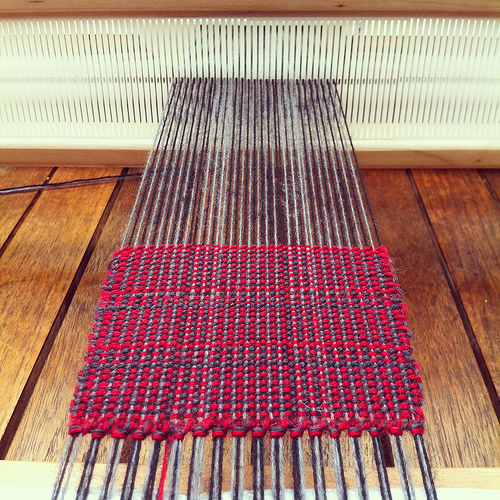
I used the red and the darker grey as weft yarns for this coaster. The result is still effective, and the colours work well together, but it loses some of the illusion of depth that coasters 2 and 3 had.
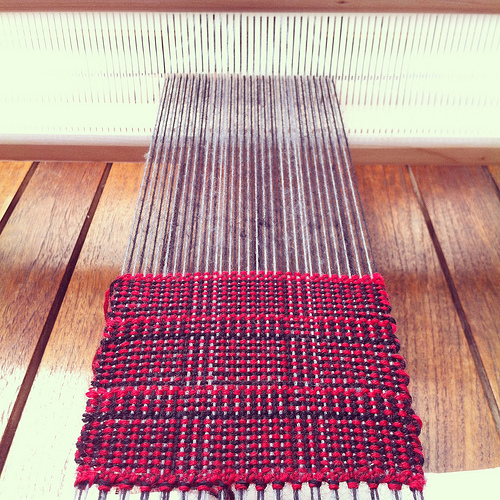
Coaster 5:
Plan: one different colour yarn, one same coloured yarn

I again used the red, but this time used the pale grey which was also used in the warp. This mirrors coaster 3 in so much as the solid grey vertical lines are in the larger panel, and the horizontal ones are in the smaller panel. Possibly not as effective.
Coaster 6:
Plan: one different colour yarn, one same coloured yarn
As with coaster 5 but this time using red and black. I thought it would be interesting to see how two very dark colours together worked out. Because of the weft order this mirrors coaster 2 with horizontal solid lines in the larger panel, and vertical ones in the smaller panel. This colour combination worked quite well — resulting in quite a bold fabric.
And this is where my plan said I should finish. But, these have all come out smaller in size than I’d expected, so I can push on for at least one more. Possibly two.
Coaster 7:
Plan: one different colour yarn, one same coloured yarn
After a break of a couple of weeks I couldn’t quite remember what colour combinations I’d used, so I was pleased that I’d been writing this blog post and instagramming photos as I went as it meant I could refer back to them. Note to self: if not doing either/both of these things, make careful notes somewhere! Maybe I should use one of those notebooks I have kicking around…
Having reviewed my notes and the photos, I decided to go for subtlety and make the most of the light/dark shadowing to make the flat weave look 3d. So I went for the light grey which is in the warp, and the dark grey. In theory, this should give a similar, but perhaps more subtle version of panel 2. And I think it did. I like the effect very much indeed. In fact, the only problem with this combination was that it was quite a dark morning (rainclouds overhead) and so I had to have the light on to be able to correctly identify the light and dark weft threads whilst I was weaving. Which, in August, seemed rather dismal. Unfortunately, somewhere during the middle section of this panel, I lost focus a bit as it’s quite a bit looser. Hopefully, the finishing process will pad it out a bit and it’ll finish off looking ok.
Coaster 8:
Plan: Inverse of coaster 7
By the time I got to doing this coaster, I was nearing the end of my warp, and the tension wasn’t that even which meant it was a bit more of a struggle. Also, I had some classical music playing (to mask the hammering going on next door which was upsetting the dog) and it was making me a bit jumpy. So, not my best work, and there was quite a bit of unweaving and reweaving to get it to a point where I was satisfied with it. Again though, I like the subtlety of the two greys and might consider doing a larger piece using these two colours, or similar closely matched colours, to see how it plays out on a larger scale.
Finishing off
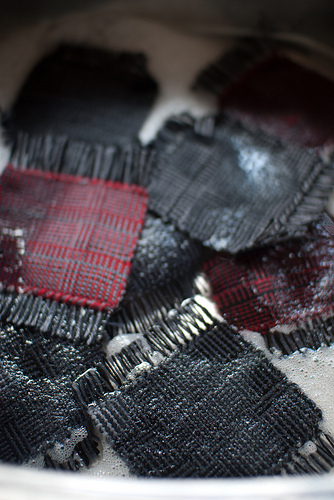
And so, time to remove them from the loom, trim the fringes, wet finish and block them. A process that always takes much longer than I think it should. This time it took me about 90 minutes, but that does include about 10 minutes when I just left them sitting in a bowl of hot, soapy water.
Having washed and blocked them I’ve taken a close look at them and I can’t decide which I like the best — it changes with the light I see them in. And how much attention I pay to the even-ness of the weaving — some of them are more consistent than others. I love the log cabin pattern though. I love how 3d it looks when in reality it is just flat. I definitely need to pay careful attention to how tightly I beat the weft and get more consistent at it. More practice needed. The log cabin pattern does make the edges interesting and rustic — having constantly interlocking yarns tends to make it quite bumpy, and that disguises quite a lot of inconsistency.
In Summary
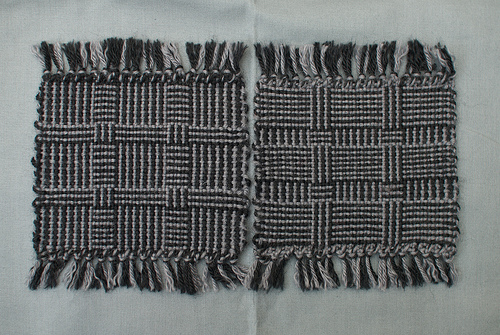
The dimensions of each coaster have ended up being 4 inches wide by 3.5 inches long (excluding fringe). I had planned for 4.5 inches long, which accounts for me getting 2 extra coasters out of the warp. I found a helpful page on ravelry about yarn weights this morning that actually equates 4ply yarn with 14dpi rather than the 12.5dpi I’ve been working on, so I may go on the hunt for some 5ply yarn for the next project.
A good project. Great to play with the same pattern and same warp across different colours and to see how much difference the colour choice makes when all the other variables are (more or less) consistent. I see more of this in my future.
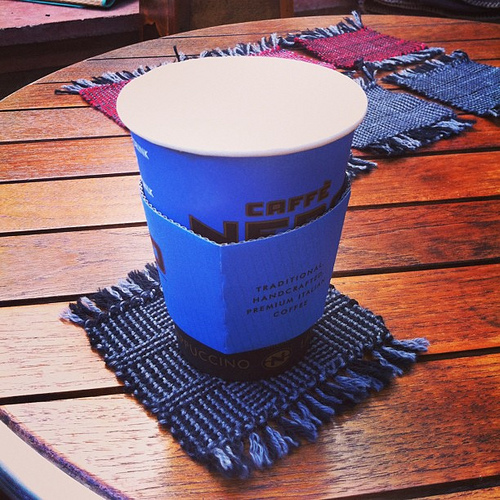
Richard has already chosen which one will be sitting under his coffee — number 3 — and at the moment I’ve taken number 1 — the initial, too tightly beaten, one whilst I work out which I want to use at my desk in the house (currently, I have the piece I made in project 4 serving the purpose), and which I’m going to take to work (currently I have project 6 on my desk).
Anyone else need a coaster?