Olympus TG 5 first impressions
I’ve bought myself a new compact camera. It is the first new camera I’ve got in a couple of years. And the first compact camera in probably about a decade.
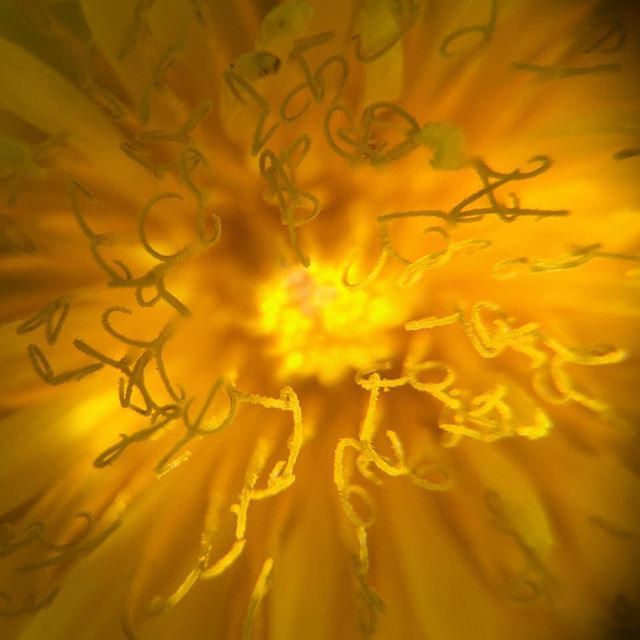
I’ve recently been enjoying taking macro photos. I’ve been using my phone with a snap on macro lens attachment, but the results have been pretty pleasing (see above for an example). I’ve been enjoying taking these and seeing the world from a different perspective, and so I thought it’d be nice to have a camera with inbuilt capabilities to take such photos. I could have bought a macro lens/adaptor for my d7000, but I know I won’t carry it around with me. Whereas with a compact camera there’s a far better chance.
So I had a look at a review site and rather liked the sound of the TG 5. The review says
when switched to the macro mode the lens can focus from a minimum distance of 1 cm
which sounds rather good. It’s also a rugged camera, being
waterproof, dustproof, crushproof, shock and freeze proof
I’m hoping not to test the freeze or crush parts of this, but waterproof and dustproof will prove handy. I tend to take a lot of photos when I’m out walking the dog. She’s a terrier and so there is often exposure to both water and dust!

My new toy arrived this morning. The first things I did were fire off a couple of test shots, get it to speak to my phone/iPad via wifi, and then leave it to charge.
These are my first-day notes detailing the things I’ve found tricky to work out with the hope they help someone else or refresh my memory when I’ve got more used to it.
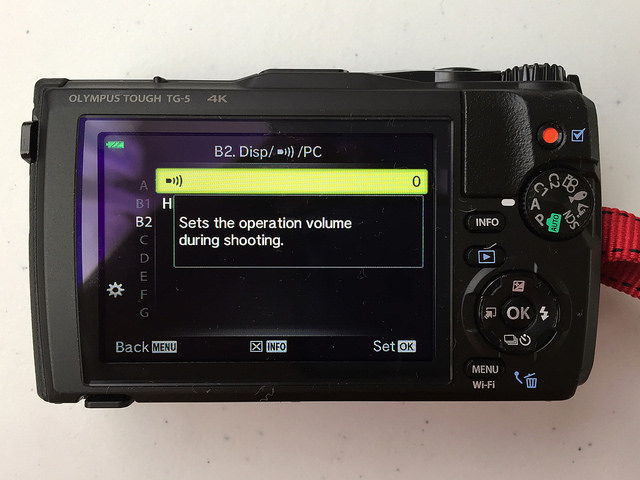
The first thing I had to work out was how to turn the focusing beep sound off. The manual is very thin regarding what the settings all do, so I had to have a hunt around the menu options. I finally found it hiding under the cog menu, in setting B2, with the image that looks a bit like a remote control. It came set at level 3, which was loud enough to make the dog twitch everytime I tried to focus on her. I’ve set it to level 0 so that it is silent.
The other thing that took me a while to work out was how to get the wifi working. There is a button labelled MENU. It turns out that if you hold that button down for about 3 seconds, it’ll turn the wifi on and allow you to connect your phone to it.
When initially fiddling with settings I managed to change the picture format so that I was storing RAW and Large/Fine images - but I didn’t know how I’d done it. It turns out that I needed to press OK and scroll to the picture size/quality icon and choose from the provided list.
The final confusion of the day was when I spotted that the images appearing on my phone/tablet weren’t the same size as those in the camera and stored on the card. It turns out that there is a cheeky little setting in the Olympus Share application which has Resize set to 2048 x 1536. I’ve chosen No Resizing for either photos or videos. As I want to do most of my editing/reviewing on my iPad, it makes little sense for those images to be reduced in size on transfer.
As with all new photographic equipment, it’ll take a few outings to get used to it and to work out what my favourite settings are. But the first impressions are favourable. It feels comfortable in my hand, it is a decent weight, and it seems to do a reasonable job of macro photography

and of course, I had to take a photo of the West Pier
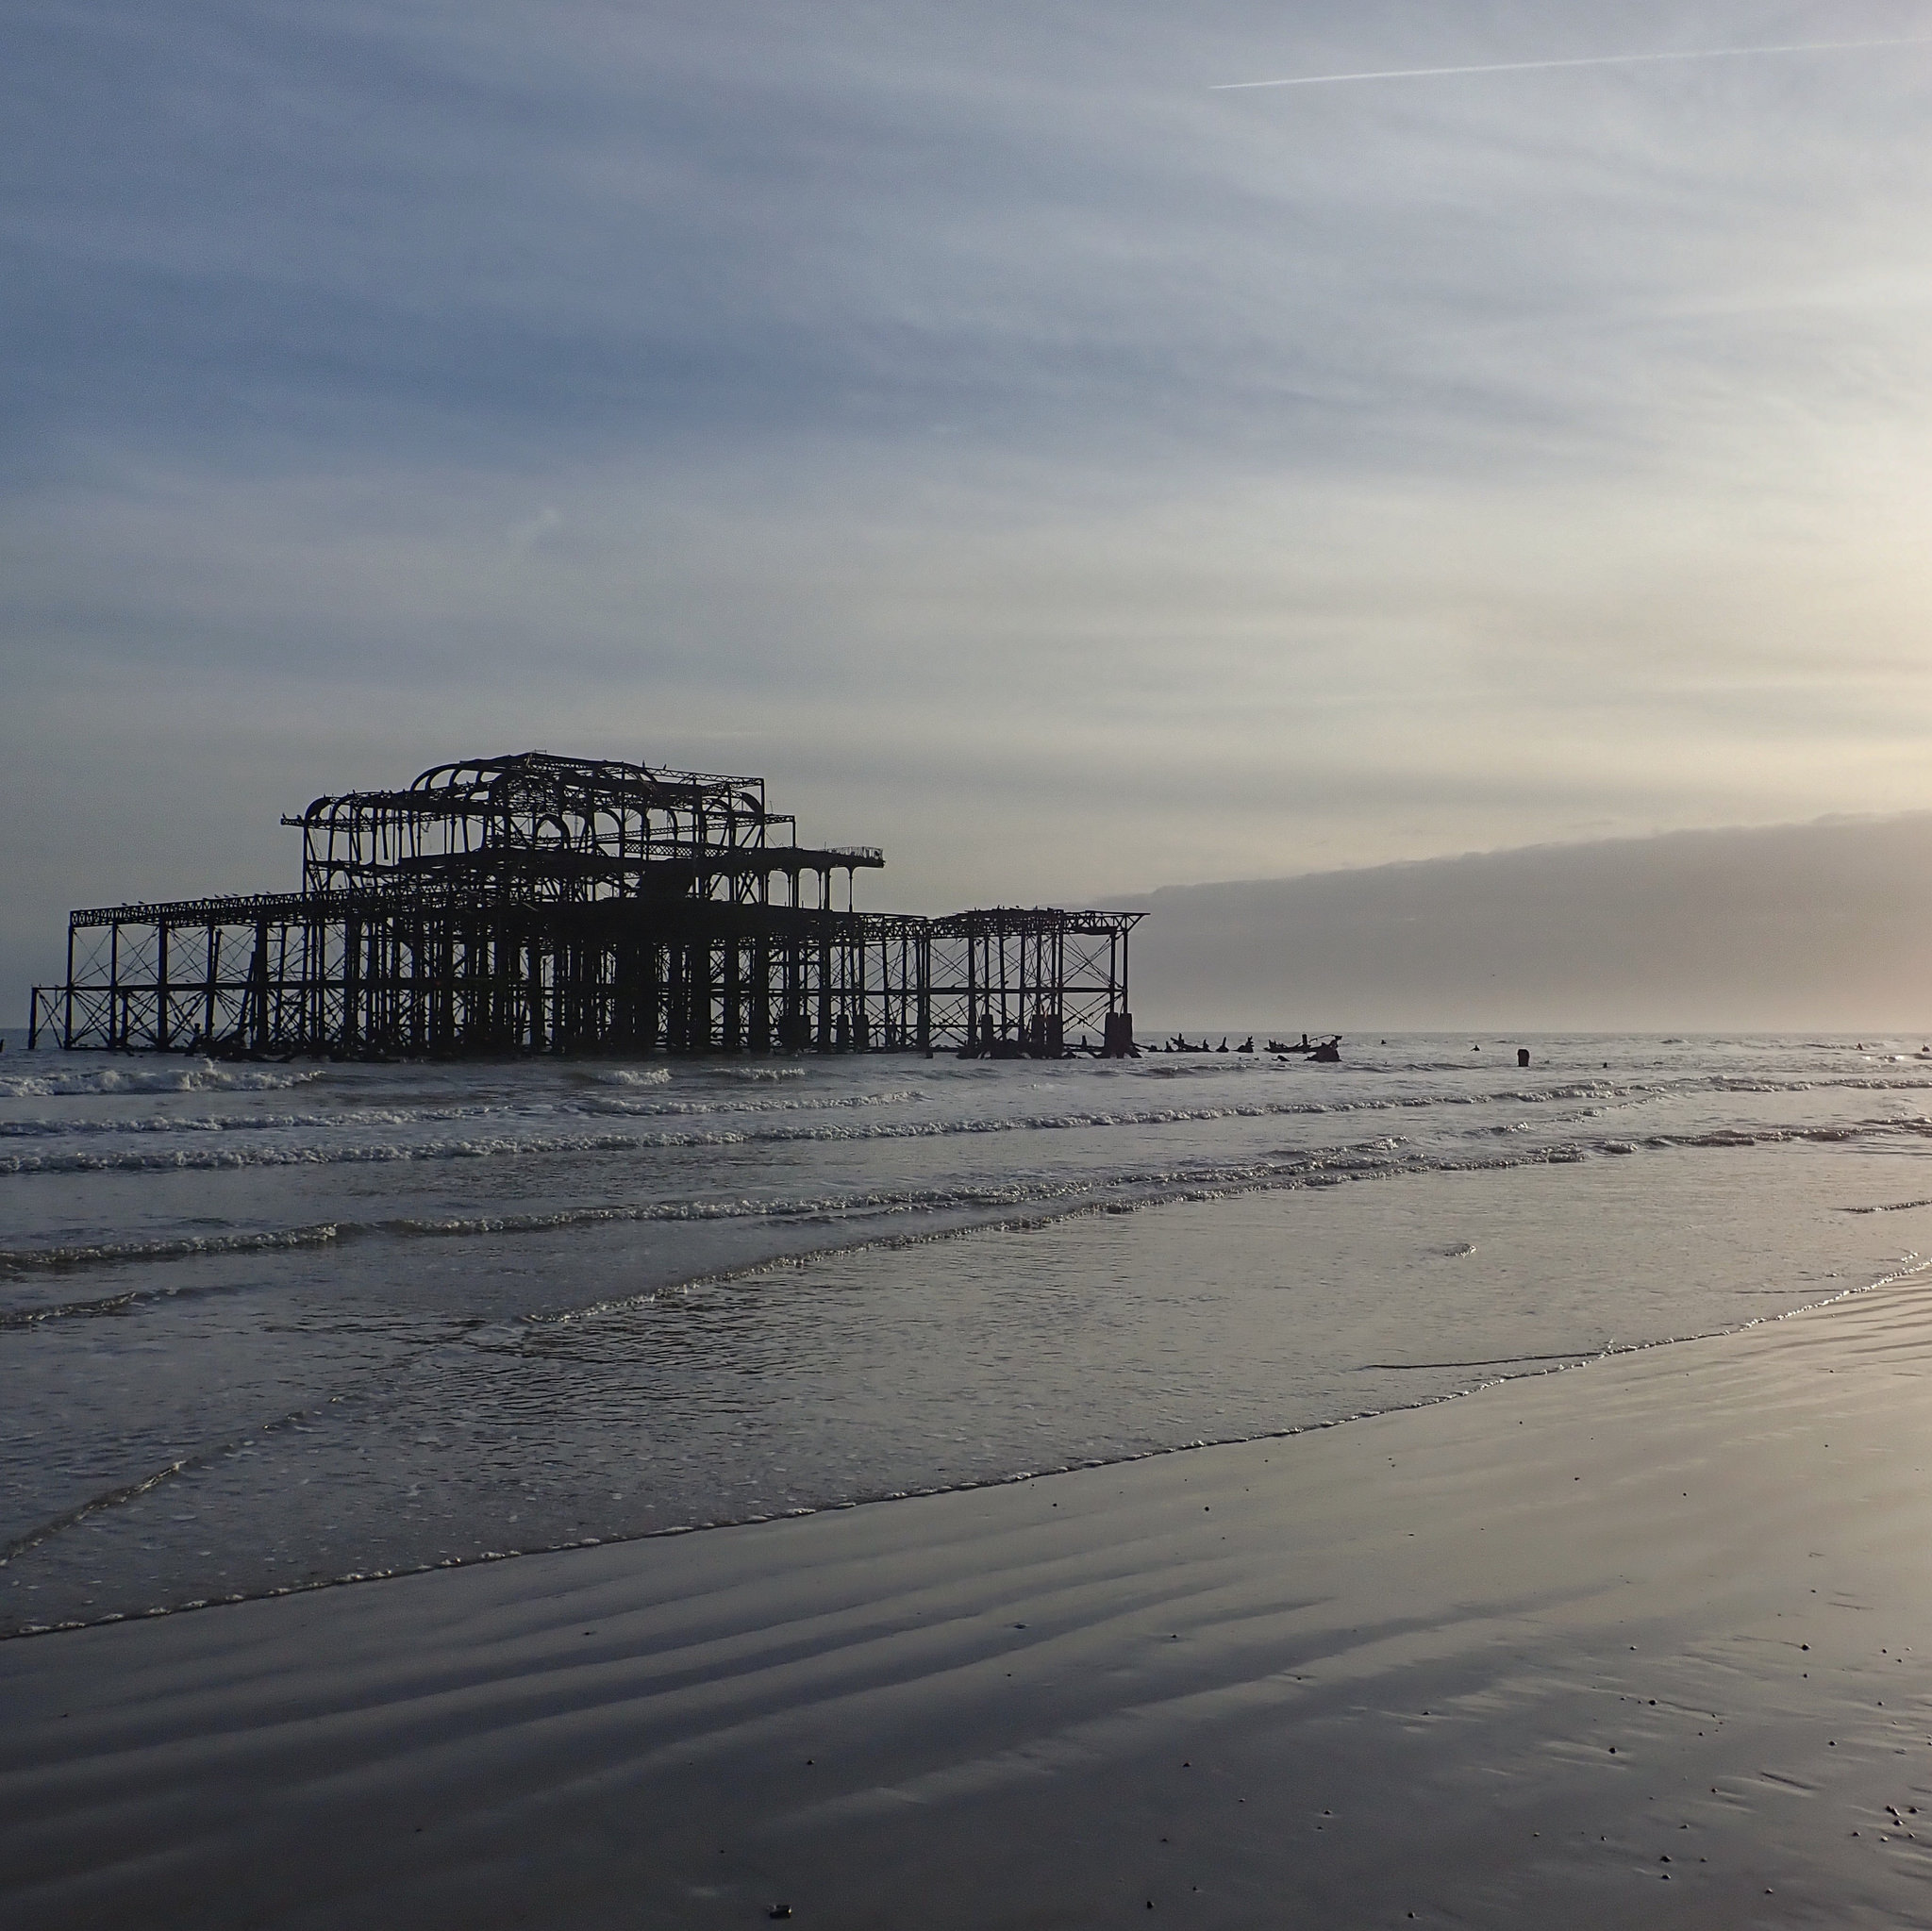
and Brighton Pier.

I feel there must be a photography law somewhere that states that as a Brighton dweller when you buy a new camera, you must take photos of both piers in the first 24 hours of ownership.