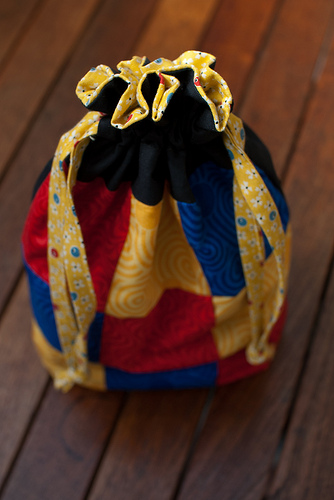
A patchwork drawstring bag
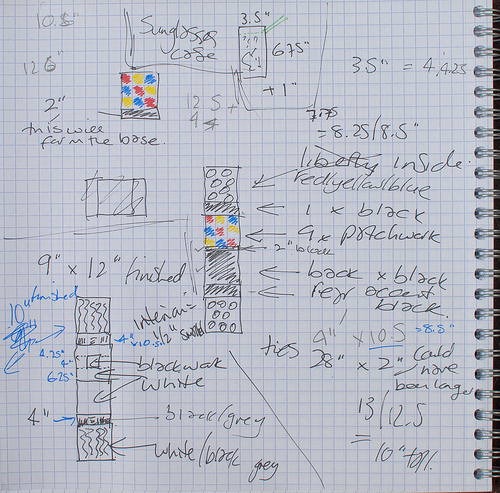
When I first made the original lavender bags, I’d ordered a charm pack of colourful 4” “squares. I’d pulled out the red, blue and yellow ones with the idea of patch-working them together and doing something, probably a bag, with them. As I’m definitely in a practicing phase of using my lovely new sewing machine, I decided to make a lined drawstring bag following this excellent pattern. I also determined that the finished square of patchwork would dictate the size, and so made a lot of scribbles and notes that seemed to mean something at the time!
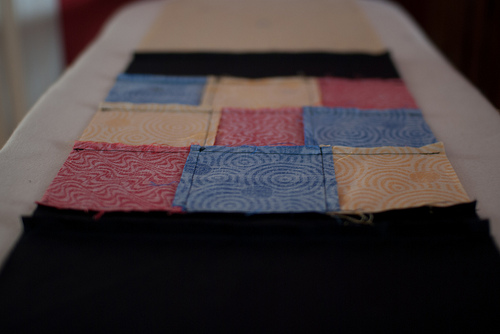
I started by sewing the individual squares, following the instructions in the lovely Quilters bible that my ever supportive friend bought me for my birthday. It seemed to work reasonably well. The top two lines are pretty close to perfect, but the bottom one is out by a bit — it is noticeable, so I need to work on my consistency. See the photo below:

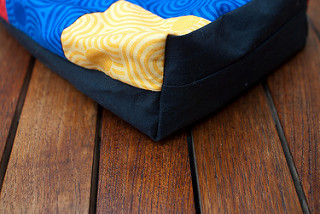
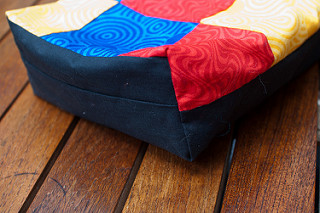
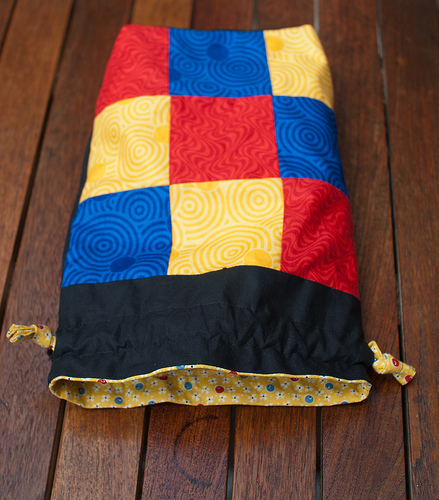
I then added a 2” strip of black to the bottom of the patchwork so that the gusset bit would come out of the black, rather than the patchwork. My calculations proved right in this regard but I still didn’t get the gusset right, although I was consistently wrong. So I had the right idea, just the wrong execution. The photos below show the result:
I’m also not sure I’ve ever used the iron and ironing board quite so much before! Here it is ready to be pressed into submission:
Having got to the point where it was all sewn up, I realised that I didn’t have enough of the fabric I wanted to use left for the ties. So I had to order more. Obviously the place I got the fabric from originally had sold out, so I had to find an alternate supplier. This alternate supplier turned out to be great as they offered me a thin quarter rather than a fat quarter meaning I had no problem getting a long enough piece of fabric. The ties are a bit on the short side, but that’s my calculations rather than lack of fabric.
There were 4 separate bits of unstitching done making this (the unstitching tool I bought just before starting this bag was well worth it’s £2).
- Unstitch one: sewing the bottom 2” strip to the front — it wasn’t straight enough for my liking
- Unstitch two: sewing the top strip to the front — again, not very straight in the execution
- Unstitch three: the top round of stitches to protect the drawstring — the tension in the machine wasn’t right and so there were little dots of mustard in amongst the black. I unpicked it all, changed the tension, re-stitched and got a much better finish
- Unstitch four: sewing the first of the two ties — it twisted a bit as I was passing it through the machine and didn’t look right, so I unstitched it back to the last good point, and started again
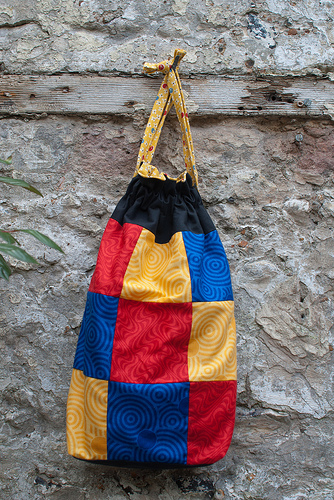
All in all, though, and despite the fact that I’ve pointed out all the negatives here, I’m really pleased with how this turned out. The colour scheme has worked brilliantly, and the lining yellow fabric goes perfectly with the patchwork squares — which is a miracle as it was ordered online. The stitching isn’t perfect, but if you’d shown it to me even 6 months ago and said I’d made it I would have laughed in your face. Originally I’d planned for this bag to hold the table tennis kit so I could easily pick it up in a morning when we’re both going out for a dog walk. It’s way too good for that (to my mind anyway) so has now become a bag to hold and transport craft projects in progress.
I also made a sunglasses case, it doesn’t deserve its own blog post, so I’ll just mention it here in passing:
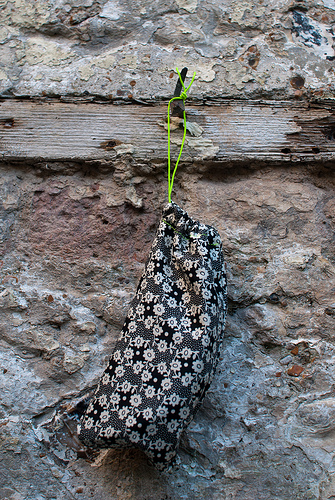
Simplest bag ever. Unlined. No gusset. Loosely following the purl bee pattern. 2 pieces of fabric cut to 4.25” by 8.5”. One piece of cord used. Top section top-stitched using a cotton that matches the cord. Not very exciting, but a nicer sunglasses bag than the one they came with.